I think one of the most important keys to good hygiene in a woman is good nail health. When girls have nails that are unhealthy, it can cause discomfort, pain in or around the nails, and, well, it can be pretty ugly! It wasn't up until about 2 years ago when I noticed that my own nails were out of shape. They were chipping and bending easily, flaking off, and peeling. My cuticles were awful, I always had strips of skin peeling up around my nails that I would of course pull off (ouch!!) and cause bleeding and infection around my nail bed. That's when I realized I had to do something!
So over the last couple of years I have developed and perfected my "perfect" manicure. However, what's perfect to me might not work for you, so this is completely customizable! Whatever works the absolute best for you. In this post I also show you how I get perfectly opaque nails, but you don't always have to paint your nails after you pamper your fingers! In fact, if you are using this to take off polish that has been on for a while, do this process and leave your nails bare for a few days to let them breathe. This will prevent yellowing of the nail that can occur from polish being on for too long. So, here goes!
Ok, first things first you need to gather your supplies and find a place where you can do everything at once, i.e a powder room, or somewhere with a sink so you aren't walking around your house with wet nails and hands. Ok, so here are the supplies I use, however feel free to adjust/add/subtract any of these.
Fingernail Polish Remover
Cotton Balls
A stone nail file, 4 sided buffers
Cuticle Remover
Cuticle Pusher. This one happens to be at the end of a nail brush I got at Sally's.
A nail/ hand scrub brush.
Handscrub: this is a recipe that I will do a post on, but a basic sugar scrub is simple if you don't want to mix up several ingredients. Take a palm full of sugar and a pump of whatever soap is at your sink and scrub hands well. Rinse.
Whatever polishes (if any) you will be using.
Okay. Step 1. Start off by filing any rough edges your nails may have. Take the time to make sure they are all evenly shaped.
Step two: I use a stone buffer to get any rough spots the surface of my nail may have. I like to add cuticle oil before I do this, just so it can get worked into my nail. I do this until they feel even, not necessarily smooth.
After this, I put my cuticle remover on my nails, following all instructions on the packaging and using my cuticle pusher.
I then take come of my scrub and place it on the hand brush. Just enough to cover the top thinly.
I then scrub them for a good thirty seconds, being sure to get underneath the nail, as well as exfoliating my entire hand concentrating on where you scraped off your cuticles. Even give your hands a short massage- Not only does this scrub moisturize your skin , but it de-stresses it as well! Rinse off the excess scrub and dry your hands thoroughly. Use some thick hand cream or lotion to work out whatever tension may be in your hand and finger muscles.
(This pic was taken before the scrub, that's why there's dirt under my thumb still! Yuck!)
I then put my top coat on like normal.
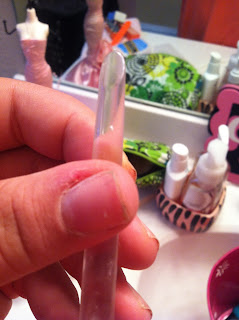
This is my thumb BEFORE the topcoat. You can see how shiny the nail gets!
For my nail color I chose "Fifteen Minutes of Frame" by Fingerpaints.
Now. Here's where I have an exciting trick to share. You see how gross and streaky this first coat of polish is? Well, I have a solution that doesn't call for 8 coats of polish that will take 8 days to completely dry haha. I learned this tip just last week from one of my favorite beauty gurus, MakeupByTiffanyD. Love her! Anyways, back to this.
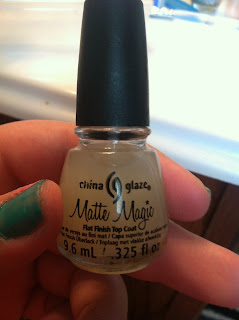
Ta-da! I add a coat of Matte Magic by China Glaze. Not sure how it works, I just know it does! So, after your first coat is dry (make sure it is REALLY dry people, or else this will not work). Add a thin coat and allow to dry completely.
Then add your second coat of color. Ta-da again!!
It comes out perfectly opaque. Just apply topcoat as normal, or do some cute nail art! (Check out my Watermelon Nail Art post for a fun, summer look)
Recipe for hand scrub used in tutorial:
1/4 cup sea salt
1/4 cup sugar
2 Tbsp of honey
2 Tbsp of olive oil
1 Tbsp of lemon juice
1 Tsp of Lavender Oil (optional, for scent purpose only)
Thank you so much for checking this post out, and keep an eye out for future ones! Let me know in the comments below if there is anything you would like to see a post on. Also, if you have any beauty related questions, I'll be happy to answer!


No comments:
Post a Comment