Hey Guys! I am SO sorry that I haven't posted lately! It has been crazy busy these last two weeks.
First off, I turned 18! YAY! I've waited my whole life for that, haha. I also got a job at Sally's Beauty Supply, which I could not be more happy about! Talk about thriving in your element!
Again I am so sorry for my lack of posts, but I will have a new July favorites and Regrets post coming probably tomorrow, as well as a few hair and nail tutorial and possibly a video? We'll see!
Talk to you soon! Xox
~Sarah
Wednesday, July 31, 2013
Saturday, July 13, 2013
My Top 15 Must Know Beauty Tips!
These are just a few things from my ever-expanding beauty tip jar in my head that really stuck out to me, and I feel like every girl should know. Some might be obvious or well know, and others might not! I hope you find these as helpful and useful as I do :-)
Oh, and these are in no order, they're all equally as helpful!
1. When doing your nails with a light color (such as white, mint, other pastels) or with a particular streaky formula, put a coat of matte polish in between your first and second coat. This will give it a streak-free and professional look.
2. Put a little baking soda in your toothpaste; It does wonders whitening your teeth without busting your wallet!
3. Use honey as an anti-inflammatory face mask.
4. Make a quick sugar scrub out of a spoonful of sugar and whatever soap you have at the sink/shower!
5. Nails yellow after a mani/pedi on too long? Soak in lemon juice for 5 minutes. It will take the color away.
6. For those of you that use faux tan spray/lotion; if it gets on your hands, use toothpaste as a soap. It will take the stain out.
7. If your in a hurry, use the cold setting on your hairdryer to set liquid eyeliner and mascara. Even your liquid foundation if you don't set with powder!
8. Mix up 1 avocado, 1 cup black coffee, 1 tablespoon of sugar and 1 tablespoon of sea salt for a cellulite fighting, body brightening, moisturizing shower scrub.
9. Keep lipsticks as well as nail polish in the refrigerator for a clean, more opaque look. It will also keep them from drying out.
10. Mix 1/2 cup milk, 2 Tbsp olive oil, and slice one whole lemon to put in a bubble bath for a brightening, skin renewal wash. The milk and acid from the lemons will get the dead skin particles off, while the oil restores moisture. The lemon scent also reduces stress.
11. If you have really tangled hair, start bushing gently from the ends and work your way up the head. This reduces hair loss and pulling.
12. Never put mascara on your lower lashes! It casts a shadow, making your eyes look very small.
13. If you are getting age spots on your hands, use facial brightening crème. It will do for your hands what it does for your face.
14. Buff your nails, then use a shiny buffing block on them before applying nail polish for a longer lasting manicure.
15. Even out streaks from self tanner with a lemon juice and baking soda scrub.
Well I hope you guys love these tips as much as I do! If you want to see more leave a comment below and trust me, I can come up with a much longer list!
XOX, Sarah
Sunday, July 7, 2013
The Perfect Manicure!
I think one of the most important keys to good hygiene in a woman is good nail health. When girls have nails that are unhealthy, it can cause discomfort, pain in or around the nails, and, well, it can be pretty ugly! It wasn't up until about 2 years ago when I noticed that my own nails were out of shape. They were chipping and bending easily, flaking off, and peeling. My cuticles were awful, I always had strips of skin peeling up around my nails that I would of course pull off (ouch!!) and cause bleeding and infection around my nail bed. That's when I realized I had to do something!
So over the last couple of years I have developed and perfected my "perfect" manicure. However, what's perfect to me might not work for you, so this is completely customizable! Whatever works the absolute best for you. In this post I also show you how I get perfectly opaque nails, but you don't always have to paint your nails after you pamper your fingers! In fact, if you are using this to take off polish that has been on for a while, do this process and leave your nails bare for a few days to let them breathe. This will prevent yellowing of the nail that can occur from polish being on for too long. So, here goes!
Ok, first things first you need to gather your supplies and find a place where you can do everything at once, i.e a powder room, or somewhere with a sink so you aren't walking around your house with wet nails and hands. Ok, so here are the supplies I use, however feel free to adjust/add/subtract any of these.
Fingernail Polish Remover


After this, I put my cuticle remover on my nails, following all instructions on the packaging and using my cuticle pusher.
I then take come of my scrub and place it on the hand brush. Just enough to cover the top thinly. 


I then scrub them for a good thirty seconds, being sure to get underneath the nail, as well as exfoliating my entire hand concentrating on where you scraped off your cuticles. Even give your hands a short massage- Not only does this scrub moisturize your skin , but it de-stresses it as well! Rinse off the excess scrub and dry your hands thoroughly. Use some thick hand cream or lotion to work out whatever tension may be in your hand and finger muscles.

I then put my top coat on like normal.


For my nail color I chose "Fifteen Minutes of Frame" by Fingerpaints.


Then add your second coat of color. Ta-da again!!
It comes out perfectly opaque. Just apply topcoat as normal, or do some cute nail art! (Check out my Watermelon Nail Art post for a fun, summer look)

Recipe for hand scrub used in tutorial:
1/4 cup sea salt
1/4 cup sugar
2 Tbsp of honey
2 Tbsp of olive oil
1 Tbsp of lemon juice
1 Tsp of Lavender Oil (optional, for scent purpose only)
Thank you so much for checking this post out, and keep an eye out for future ones! Let me know in the comments below if there is anything you would like to see a post on. Also, if you have any beauty related questions, I'll be happy to answer!
XOX, Sarah
Watermelon Nail Art
Hey guys! So today I was roaming around Pinterest when I ran across some ADORABLE nails- (which doesn't take very long if you're familiar with Pinterest) and I just had to try them out. I've always wanted to do this design but never really attempted it, so this afternoon I figured it was time! These are two original pictures I saw on Pinterest:


I absolutely loved them both! So I thought, why not combine the two?
I did! Here's How:
I started off by painting my index, middle, and ring finger with Finger Paint's "Fifteen Minutes of Frame", and my pinky and thumb in Loreal's "Pink Carat". In this picture my thumb is painted with my Revlon "Eclectic" polish, but I decided the two greens clashed so I stuck with two base colors.

Then with a clean striper brush, I did vertical lines on my index and ring fingers with a mixture of Sinful Colors "Innocent" and my Revlon "Eclectic" They turned out like this:

Make sure they look really squiggled and not uniform (they look messy in this picture but as always I clean up lines after I complete the manicure)
I then went on to do a slanted design exactly like the middle finger in the second picture using the same colors, just using my striping brush to give it a clean look.
Lastly, I did a French manicure type look on my thumb and pinky, using Finger Paints 15 Minutes on top, with a thin line of Innocence mixed with Eclectic underneath.
And of course, don't forget the seeds! Using a plain dotting tool and black polish, I scattered dots throughout the design,
So here's the final product!


Thanks so much for checking this out! I hope you enjoyed it :-) More soon to come :)
XOX, Sarah
Saturday, July 6, 2013
How to cover up sunburn with makeup
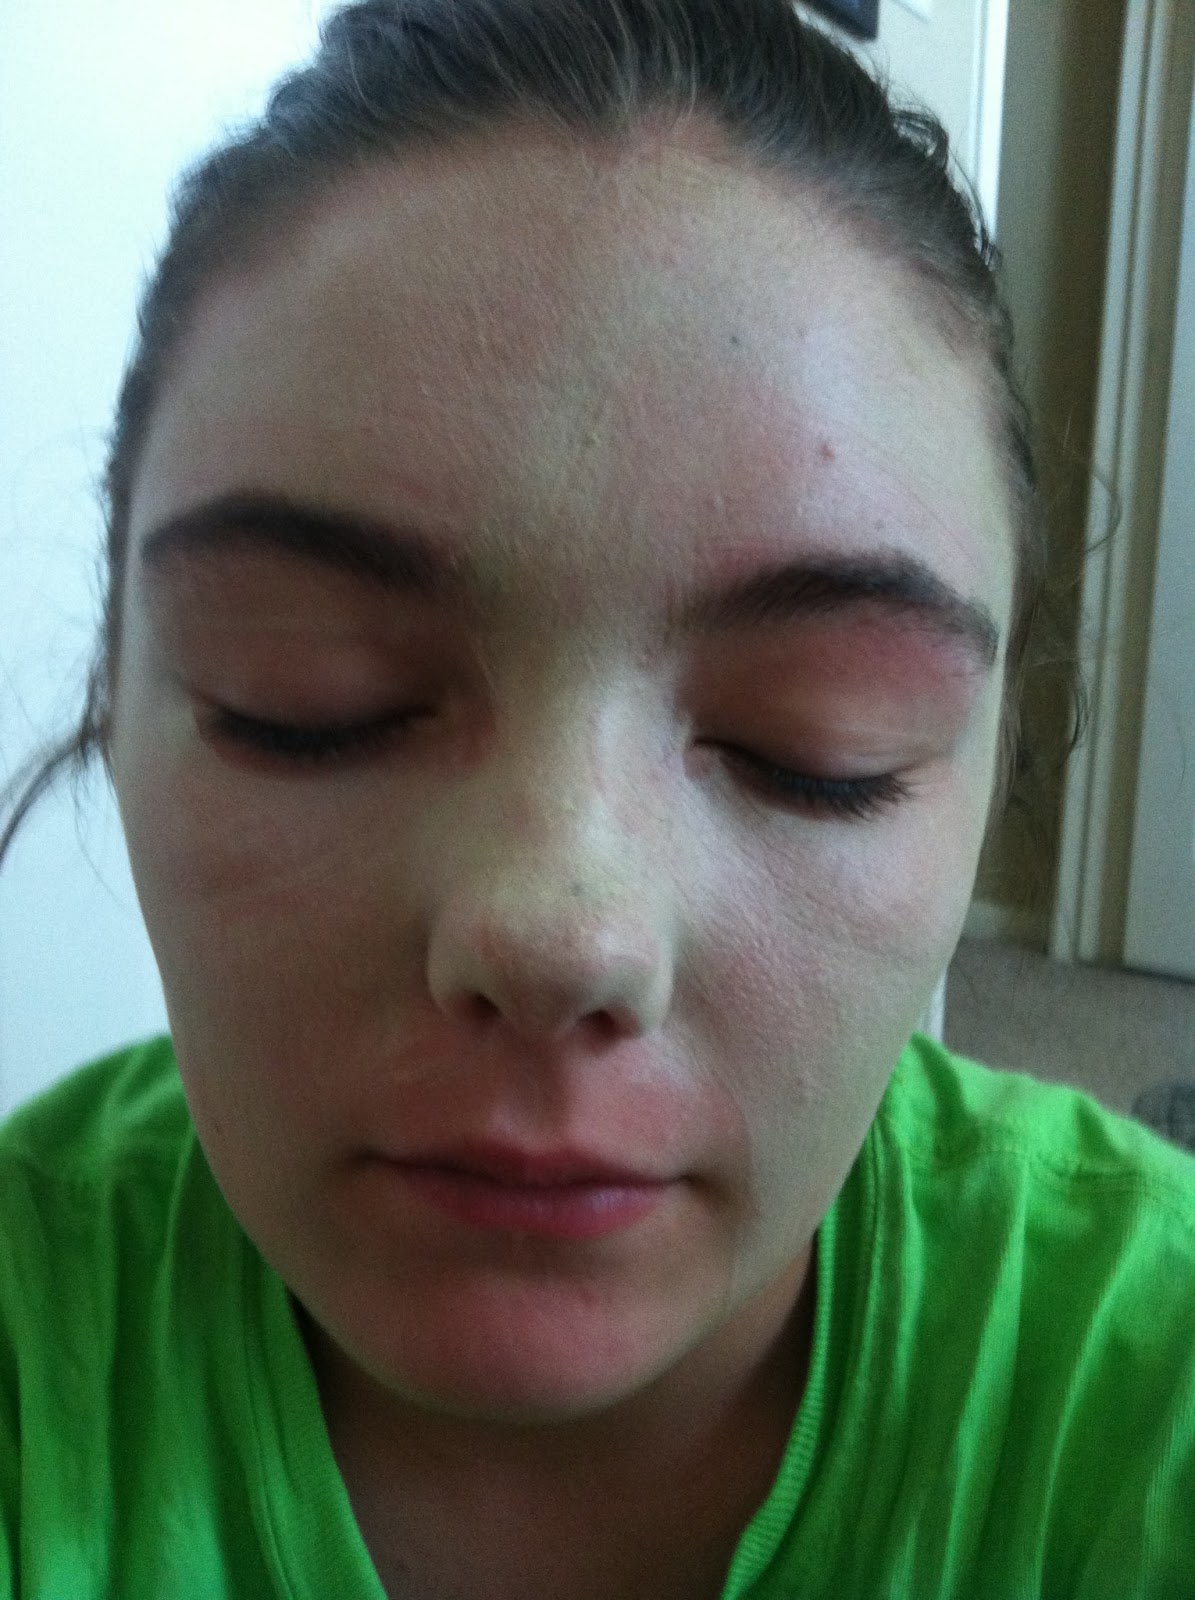
Today my two little sisters got back from summer camp, and boy are they sun kissed! The youngest one has quite the cute little glow while the next one, well, she looks a little more sun slapped than sun kissed. Regardless, her face is pretty pink and uneven, and she didn't want to look like that going out, so I told her I would share a few tips and tricks to concealing sunburn if she would model for my blog, haha.
And this is my model, my sun slapped camper Abby! This picture doesn't really show just how pink her skin got, the light neutralized it a bit!

Step 1- Moisturize, Moisturize, MOISTURIZE!
I can't stress it enough. The number one symptom you will receive for a typical sunburn is completely dried out skin. The sun has sucked all of the moisture out which allowed your skin to burn- so now it's your turn to replenish it. One of my favorite products for this is the Clinique moisture surge gel- but sadly I didn't have any when I wrote out this tutorial, so I had to use my Clinique Dramatically Different Moisturizing Lotion. I like this one as well, it's just a little thinner formula than the moisture surge and requires you to apply a little more than normal. About a nickel size amount should do.
 This will act in place of your primer unless you feel that you really need it.
Step 2- After letting the moisturizer soak in for a moment or two, start to apply your concealer. This is the most important part in neutralizing your skin tone- your concealer color choice. The colors green and yellow balance out with red, allowing a more yellowed out skin color to become apparent. For this task I chose my NYX concealer pots in green and yellow. This formula in particular is very thin and liquid-y, almost like a wet foundation palette. It goes on exceptionally well and blends out even better.
 Apply it in the areas that you feel the color is the worst- we will blend it out to the lesser effected areas in a minute. I usually apply the green and then the yellow on top using an old e,l.f eye shadow brush because it's so soft.

 Step 3- I then use my e.l.f foundation brush to blend it out, very gently, using circular motions blending from the center out to the edge of her face/hairline.


I do have a disclaimer, though. I really don't recommend trying to cover up your sunburn every day, or even for extended periods of time throughout the day. It's an actual burn wound, and should be treated as such. I'll share some tips about how I take care of my sunburn at the bottom of this post. But for now, here are a few makeup magic tricks to help you achieve a more neutralized, even, skin tone when you need to.
There are five steps I take when concealing my sunburn.
And this is my model, my sun slapped camper Abby! This picture doesn't really show just how pink her skin got, the light neutralized it a bit!

Step 1- Moisturize, Moisturize, MOISTURIZE!
I can't stress it enough. The number one symptom you will receive for a typical sunburn is completely dried out skin. The sun has sucked all of the moisture out which allowed your skin to burn- so now it's your turn to replenish it. One of my favorite products for this is the Clinique moisture surge gel- but sadly I didn't have any when I wrote out this tutorial, so I had to use my Clinique Dramatically Different Moisturizing Lotion. I like this one as well, it's just a little thinner formula than the moisture surge and requires you to apply a little more than normal. About a nickel size amount should do.

Step 2- After letting the moisturizer soak in for a moment or two, start to apply your concealer. This is the most important part in neutralizing your skin tone- your concealer color choice. The colors green and yellow balance out with red, allowing a more yellowed out skin color to become apparent. For this task I chose my NYX concealer pots in green and yellow. This formula in particular is very thin and liquid-y, almost like a wet foundation palette. It goes on exceptionally well and blends out even better.


Until it looks something like this...
Step 4- I then take a blending sponge, usually my beauty blender, and carefully
(without rubbing the product off) blend it out and picking up any extra and unnecessary product on the blender. Do this until your face looks a little less green, like this:

Step 5 - Then add your foundation sparingly where needed. I just used a small pump of my Revlon BB cream because of its thicker formula.

Extra Step- If you feel like you need to set some spots with loose powder, I recommend using the e.l.f HD Translucent setting powder, just in the spots you need. Do NOT do it over your whole face. Talk about cake face city. When your done, it should look something like this:

TIPS FOR TAKING CARE OF SUNBURN:
1. Definitely cliché but definitely useful, Aloe Vera gel. This stuff is a must have, even if you aren't sunburned it can work as a de-stressor for your skin. One trick I love doing before I know I'm going out in the sun is to stick a bottle of the stuff in the refrigerator- talk about refreshment for your skin!!
2. Add baking soda and oatmeal to your bubble bath. Only soak for 15-20 minutes though, or you might dry out your skin even more.
3. DRINK TONS OF WATER. As I mentioned above, your skin becomes extremely dehydrated and needs your help replenishing the moisture. Without this step you can peel more quickly and worse than you would if you drink lots.
4. Taking Aspirin and Ibuprofen also help with swelling and inflammation. Green Tea and Pomegranate juice also have natural anti-inflammatory elements.
5. Use soothing lotions and body creams. My all time number one favorite is Hawaiian Tropic's After Sun Moisturizer (they also carry a gel). This stuff not only soothes and replenishes your skin but also smells amazing!
Thanks so much for checking this post out, and be sure to check out my June Beauty favorites and regrets!
XOX, Sarah
How to: Making Super Glitter Eyeshadow
So, this past week I did a lot of cleaning and organizing through my makeup. I found a little pot of glitter liquid eye shadow from Icing that I've probably had laying around for a while now. The clear section in the middle of the pot actually was gone...pretty ghetto haha.

I also ran across a little bag of iridescent glitter I had ordered from Etsy for another project that I had never gotten around to. So then the little light bulb came on...why not combine the two and come out with a mega glitter eye shadow?!


I also ran across a little bag of iridescent glitter I had ordered from Etsy for another project that I had never gotten around to. So then the little light bulb came on...why not combine the two and come out with a mega glitter eye shadow?!

So, for starters, you'll need some sort of liquid or gel eyeshadow, preferably clear with some sort of glitter inside. Mine was from Icing in the shade Twinkle Twinkle. Next, you need a pot to deposit your new shadow in, I chose a small clear one I got in a pack of six from Hobby Lobby for pretty cheap. (I also use them to deposit my NYX Jumbo Pencils) This part is honestly up to you. I was forced to get a new container since my original was broken, but if you feel more comfortable keeping it in the original, feel free.

Next, you'll need a tool to scrape and mix your product. I chose a small two-sided sponge from one of my makeup kits; I never use those. You then want to proceed to scrape the product from it's original container into the new one. (Skip this step if you chose to keep the original container)

I then added my glitter. I didn't want to go overboard and risk drying out the gel. I just filled the small hole to the left of the container and thinly covered the top.


Now, mix the products thoroughly; You don't want any glitter clumps bursting when you put this on your eyes! You also don't want it clumpy in general- make sure you get it as smooth as you can.
These are the two swatches of the products. The one on the left is the new mixture, and the one on the right is the old.

Thanks so much for checking this post out! There will definitely more to come. If you like this type of DIY makeup leave a comment below and let me know if you would like to see more of it. Also, if you have any tips for DIY eye shadows let me know in the comments below!
XOX, Sarah
Friday, July 5, 2013
June Makeup Favorites and Regrets
This month I found some great products...and some not so great ones. Check out what they are below!
These aren't in any particular order, just as I found them in my makeup drawer!
- Regret number 1- Elf Mineral Infused Face Primer...err I guess it's for your face, no where on the packaging does it say otherwise...

-Regret number 2- Revlon Photoready BB Cream (or should we say foundation)

I really don't "regret" buying this per se. I just don't really like how heavy the coverage was, especially for a BB cream. This formula definitely isn't lightweight. I will definitely use it when I need the heavy coverage that it offers, but when it comes to BB creams I look for a soft, almost sheer coverage product. I do think the shades they offer are great though, the Medium shade matched my skin to a T. $7.00 at HEB
Those were my only two regrets for June! Now on to the favorites!
-Favorite number 1- CoverGirl Intense Shadow Blast (in Bulletproof Beige)
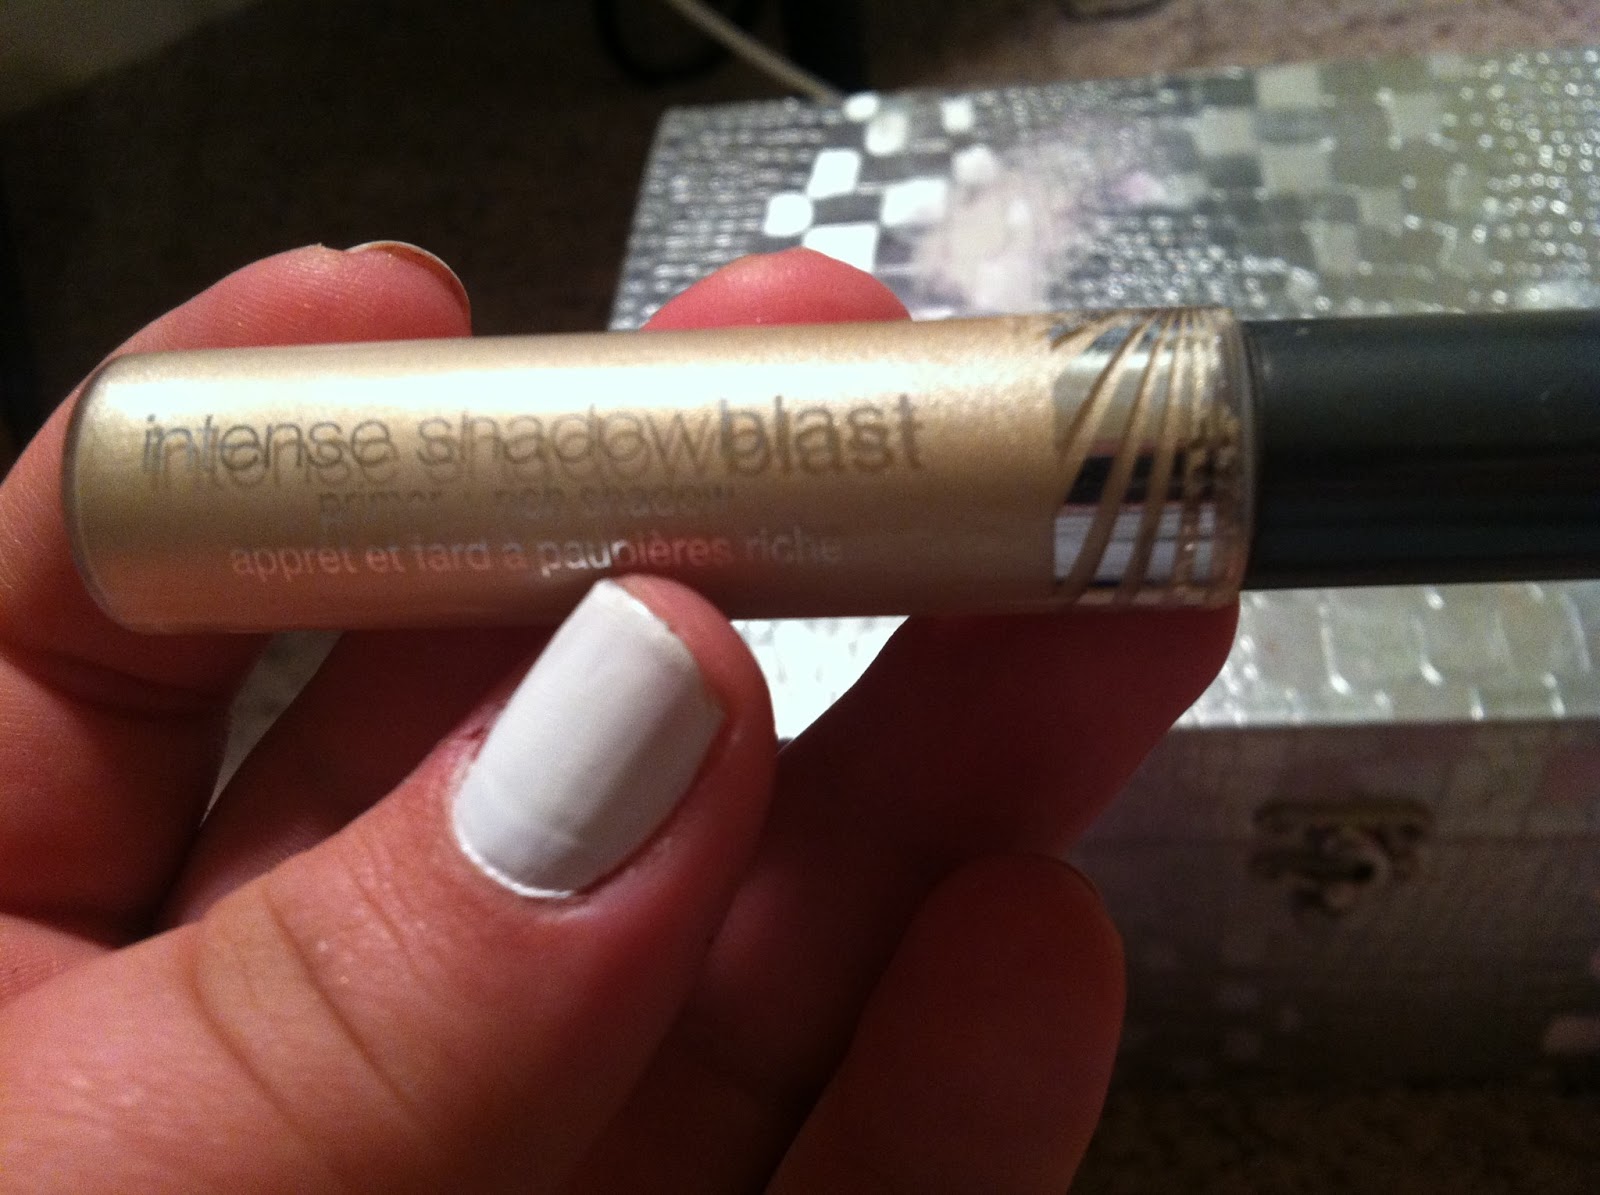
This stuff is GREAT! I really didn't think I would like it, since I'm not really much of one for shadow/primer combos, I feel like sometimes when you combine two key ingredients like that you can skimp on the quality of the formulas. I absolutely love using this as a base for almost any smokey eye look, and the primer actually works really well at clinging on to your shadow all day. I need to go purchase the other colors! $6.00 at any drugstore
-Favorite number 2- Urban Decay All Nighter Makeup Setting Spray

-Favorite number 3- "They're Real" Mascara by Benefit

I actually picked this up by accident at a Sephora over my vacation (it was the birthday sample set)- and boy am I glad I did! I'm already almost out of this stuff, and I need to go pick up the full size. The formula is great and non-clumpy. The applicator is as well, and it really reminds me of the Armani "Eyes to Kill", yes, it's THAT good. It came in a kit with the Watts Up! Brow and cheek highlighter- it was OK, but not something my Rimmel Scandaleyes Pencil in the same shade couldn't do. Free for me from Sephora :)
-Favorite number 4- NYX Pot Concealer in green and yellow

These two little things will forever be a must-have in my makeup kit- and to think I picked them up for only 4 bucks a piece! These concealers are great for summer, and here's why: In the summer, everyone goes out in the sun, either at the beach, the pool, or even watering the garden. Butttt, Sun + Skin + being out a little too long = red, splotchy skin. The perfect blend of yellow and green help to balance out those too pink cheeks and foreheads and neutralize your skin tone. They aren't as thick and heavy duty as my Hard Candy Glamoflauge, but this mostly just helps to even out the tone of your skin. I'll do another post on how to cover up sunburn/ pink skin. $4.00 each at Ulta
And last, but not least, favorite number 5-
Hawaiian Tropic Moisturizing After-Sun Lotion in Lime Coolada

This stuff is
great- not only the smell, but the effects as well! Not only does this moisturize your sun-baked skin, but by doing that it helps to prolong your tan and that beautiful summer glow. I picked this up for $8.00 at Ulta. Thanks so much for checking this post out- stay tuned! Much more to come.
XOX, Sarah
Subscribe to:
Posts (Atom)